First I made my moulage.
Then I made my sloper.
They looked a lot alike, so I only blogged about my moulage. Here are the most recent details I wrote about that Lynda Maynard class in this posting.
We've been working on getting a sleeve to fit into our slopers for two classes now. And I'm continuing to work at that fit and pattern drafting task at home.
 |
This is not the most attractive garment I've ever sewn!
It's a sloper, which is the equivalent of my moulage plus wearing ease.
Yes, I know I've got too much ease in my sleeve at this point
After I made more change at home, and before I went back to creating
a new version of the pattern, I did the math -
The total distance around the sleeve stitching line for the
armscye/sleeve cap, should be 3/4 of an inch
larger than the distance for the front and back arm holes. |
 |
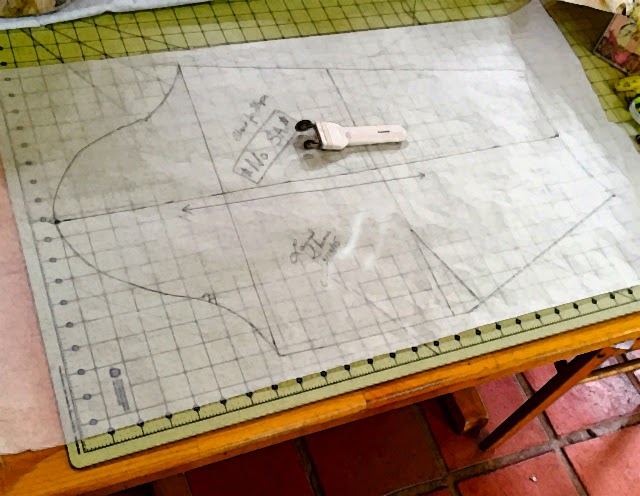
Can you see the work that went into my first shot at drafting a sleeve pattern?
I also write small to do lists on the pattern piece and use a lot of color coding and
dating to remind myself of what I did in class versus at home, etc.
This is the follow on to the drafting block by the way.
I re-scooped the front, flattening it and giving it less curve, added to the height at
the top center to get the bicep balance line to come out parallel to the floor,
and also added 3/8 of an inch to both the long underarm seam lines. |
 |
After making all those changes, I definitely needed a new version of my pattern!
After I made this, I traced out a new sleeve to cut out and sew to try on the other side
of my muslin sloper. |
Still To Do
before class
Next - I'll be stay stitching my second muslin sleeve, cutting it out, basting the balance lines, completing the underarm seam line, and basting in the ease lines.
Then I need to go back to my sloper and alter my side seams to be 5/8 of an inch farther into the seam allowance. I have 1 plus inch seam allowances.
Must remember to note that change on my sloper pattern! Good thing I haven't cut out my most recent version of that pattern, so I can draw that in and use my eraser and still have a clean final working copy.
Entonces I 'll attach the sleeve to the other side of my sloper, making sure my front is attached to the front part of my sloper fit garment, of course!
At that point I'll check all the balance lines in the mirror and see if I need to alter any thing else obvious before I return to class next week. I included a slightly over 1" seam allowance when I drew the pattern markings on, so I can make some alterations.
I create a new version of all my patterns every week after class. That way I have a record of where I've been and what I've done. I can go back to a previous version too. Also it's just less confusing and it motivates me to write more notes on my patterns.
I also include my name, date, phone number and email (I've smudged those out in these photo)
on every single pattern piece and muslin garment.
In sewing lab, everybody's stuff looks the same and it's a lot of work down the drain
if I misplace anything.
~ ~ ~
It's not exciting or glamorous working on creating a perfect-fit-me garment, but it sure leads to a lot of daydreaming about what I'll work on once I have the patterns that result from this process.
And that's the kind of thing that keeps me ....
Enchanted by Sewing!
]


